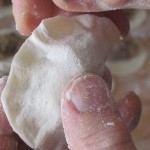
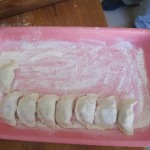
The proportion below gives me some 140-150 pieces. I work with 3” (7.5 cm) dia cookie cutter, but you can use a wine glass, or cut square shapes and fold into triangles if you so desire. Apart from the obvious size and shape of the pierog cutter the final number of pierogi you produce will depend on the amount of the dough, its thickness, and the thinness of the dough sheet you will roll out.
The balance of the filling is also often a factor. For example, the recipes attached here for ruskie and cabbage & mushroom will produce enough filling for about 75 pierogi each.. Meat filling is usually enough for the complete 150.
Adjust the numbers as you go. You are stuck with one egg – and keep in mind that one egg goes a long way – should you multiply this recipe by two, one egg will still be ok. More eggs usually translates into a tougher dough – you really want only the minimum required to make the dough pliable and possible to glue together.
It is usually better to be left with more dough than more filling. The leftover dough can be easily transformed into delicious pasta, while the leftover filling has to be frozen etc…
- about 1 kg of flour (do not pack it – just sift in – if too much flour the dough will be hard to roll); you may need more if the dough appears too loose.
- 600 ml – (good 2,5 cups) of water (or more, if too thick)
- 1 egg
- salt
- sliver of butter (or marg) – optional,
- flour to dust the rolling board and trays on which the ready product resides,
- option: water, salt in which to boil them; you can, afterwards, fry them as well.
some stuff to pour over pierogi, when done – usually
- chopped bacon pieces with onion, fried till brown, or
- onion fried in oil, or/and
- sour cream…, or
- other fancy sauce, as in here.
I use the mixer (dough mixing hook), but until recently I did it all by hand – can be done.
If using a machine, drop all the flour, the egg, the water, salt and butter into the bowl and let it ride.. Preferably the speed should be high, so that the dough get well ‘beaten’. The final form should be holding on to the hook, fairly thick, but uniform in texture. It also no longer sticks to the bowl, it is collected in one big blob around the hook.
If working by hand, start with some water, some flour, the egg, the salt and the butter and start mixing, adding the remaining water and flour gradually. When dough is too difficult to work with the spoon, unload it onto the table top and work with both hands (throwing the ball of dough onto the surface is ok, as long as you table is strong. Make sure you have some flour on the table surface when working, so that the dough does not stick to the table surface.
The longer you work it, the better, but..
When you think the dough is smooth and ready, place it in the mixing bowl and cover (so that it does not dry). Let sit for 30 min or more.
When you have waited for the dough to rest, you have prepared the filling – or made sure it is available and is at room temperature.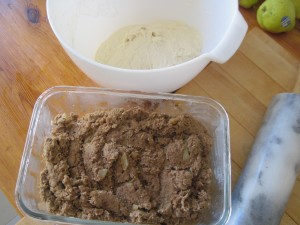
Now we start the production line, illustrated by pierogi with meat (beef) filling.
You need:
- Large table top surface clean, dry, sturdy (can not wobble), smooth
- Flour to dust the table and the fingers, as you go
- Rolling pin (some people get away with the straight wine bottle filled with water (for weight), but it is not as easy to manipulate without damaging the dough
- Cutting device – some people use round cookie cutter, some use the wine glass tipped over..
- Some dishes in which to place the ready product. I usually freeze most of my pierogi, so I use old Styrofoam trays (meat, fish or cheeses are sold on those) and, as they are filled, i place them directly in the freezer. If you intend to serve what you produce, prepare some flat dish (large plate, a tray.. ) and dust it with flour. The thing is that ready to cook pierogi can not wait in layers – they must be placed in single layer in flat surface dusted with flour – otherwise they stick together and after a while you are looking at one complex blob of something..
- Filling and a small spoon with which to distribute it
So –
Grab or cut a piece of dough, place it on a floured surface and start rolling. You will find that the supply of flour must be at hand, as the rolling pin will need ‘drying’ often. Also, you must make sure that the BOTTOM side of the rolled sheet must be dusted occasionally, as it wants to set anchors on the table – we want it floating freely.
Roll in all directions, start from the centre out, but change direction often and do not spare the energy. Final result should be about 2 mm thick.
Now take a cutter and cut as many little circles (or squares) as you can (topology 101).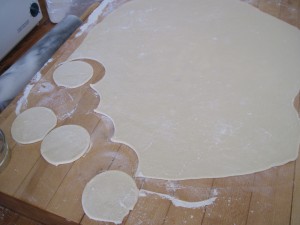
Pick up the pieces of dough left between the shapes, squash with your hand and hide under a cup. This will be a reusable collection of dough you can roll out again, if desired.
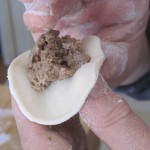
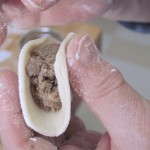
Place a spoonful of filling on each little island of dough.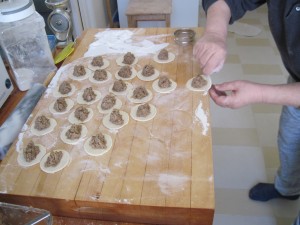
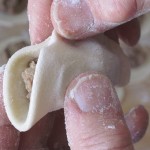
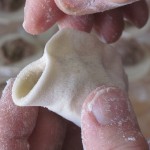
Pick them up one-by-one and fold, closing the edges very carefully, squeezing between the fingers or with a fork on the table. It is essential that no open gaps are left, and no filling is sticking out – this is a disaster in cooking – they will fall apart.
Place the ready pieces on a tray lightly dusted with flour.
They will be safe waiting to be cooked for a few hours in the fridge (or immediately after the production is complete, naturally). If you plan to keep them in the fridge, cover them with a cotton cloth or some kitchen grade foil..
Pierogi can be cooked right away or frozen to cook later. Always use a lot of boiling salted water, on high heat. They will fall into the bottom of the pot, and, when almost ready, will return to the surface. From then on boil for another 3-4 minutes and retrieve them with a flat, colander-style spoon.
On a serving dish drop some greasy-style stuff on – a bit of oil, oil with fried onion, bacon etc – otherwise hot pierogi will tend to stick together again..
Freezing:
I freeze on flat trays. I let them sit for about 1 ½ to 2 hours, then they are rigid enough to be collected into zipper-lock freezer bags. Since the production is rather messy, I tend to make a lot at once, have one clean up task, and good food available on demand – once done, they are so easy to reheat and serve…
